


- Video
-
Club Roar
Captured a great grassroots sporting moment? We want to see it!Content Collections
The Roar Community
- Join
- Login
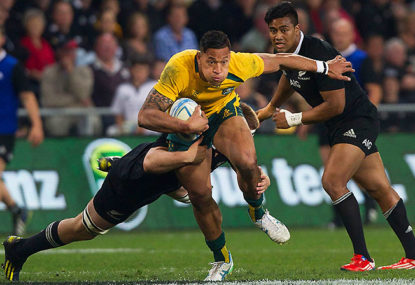
There were plenty of decisive moments in the third and final Bledisloe match of 2013 – here are the five I’ve chosen to discuss.
Kickoff receipts
It’s impossible for any team to build momentum if as soon as they gain momentum by scoring they give it back to the opposition by not securing the restart, yet that’s exactly what the Wallabies did.
Of the six times the All Blacks kicked off after the Wallabies had scored, the All Blacks got the ball back from five of those!
The Wallabies’ kickoff receipt structures are a shambles. We all know the All Blacks normally split their forwards on either side of the field, yet the Wallabies either missed this tactic or believed their backs could handle the threat on their own.
On the first two restarts the All Blacks kicked short and left, sending one of their locks to the left side of the field, yet the Wallabies left their forward pods on the other side of the field, leaving the backs and unsupported forwards to compete for the ball.
On the next two kickoffs, Aaron Cruden kicked short and right to where the Wallabies forwards were stationed.
Despite having numbers on that side, the Wallabies’ pods both started near the touch line and couldn’t move quickly enough into position when Cruden kicked the ball short of them. The All Blacks ended up with possession from both kickoffs.
In the second half, the Wallabies went to a split structure with forwards on both sides of the field yet still lost the first kickoff after points were scored.
That’s the first five kickoffs after the Wallabies scored where they couldn’t regain possession!
It was only on the sixth and final kickoff by the All Blacks after the Wallabies had scored that the Wallabies finally secured a kickoff.
The problem is their structure – they need to use a split set up with forwards on both sides of the field for every kickoff with a clearly defined pod of three on each side of the field.
At the moment the lifters and jumper are trying to act as a pod and also cover a part of the field individually.
I’d have Rob Simmons and Scott Fardy as the jumpers, with the hooker and one prop lifting on one side of the field and one prop and the other lock lifting on the other side.
This would leave the openside flanker, the number eight and the backs to fill the holes on the ground.
Julian Savea try
What great vision from Israel Dagg to set up this try.
The Wallabies did very little wrong in defence – they had four players covering the short side against Julian Savea (A) on his own.
Israel Folau (B) was in behind the line on the open side of the ruck where he should have been. Dagg (C) started on the other side of the ruck and moved quickly to the left side of the field.

Dagg (C) changed the balance by switching so quickly to the left side and beating Stephen Moore (D) for pace.
If Adam Ashley-Cooper (E) had stayed wide, marking Savea (A), Dagg would have run around Moore and scored himself.

With the benefit of hindsight, Will Genia (F) should have moved behind Moore in a cover defence role rather than coming up into the line as he did and Folau (B) could have moved faster in cover.
But it’s very hard to defend against the speed Dagg made the decision and executed the play.
Adam Ashley-Cooper try
This try just before halftime ensured the Wallabies at least stayed in touch with the All Blacks, which probably gave them a good confidence boost, whereas if they’d failed to convert the opportunity it would have been a real blow to confidence.
Quade Cooper and Ashley-Cooper might have finished off this try but it was Matt Toomua who created it with his line break and it was Peter Betham who created the line break.
As you can see from the front-on image, it was the presence of Betham (A) on the inside that attracted the attention of both Liam Messam (B) and Jeremy Thrush (C) to open up the hole for Toomua (D) to run through.


On the next phase Cooper (E) threw a great pass wide and over Ma’a Nonu (F) to Ashley-Cooper (G).

The Wallabies need to use more of these inside runners/decoys in both their first phase plays and in general play.
Wallabies first phase play
In the 74th minute, with the score at 41-26, the Wallabies ran a first phase play from a lineout close to the All Back line.
While they didn’t score on that first phase, an opportunity was created on the second phase, with Isreal Folau unmarked out wide.
Unfortunately, Quade Cooper’s pass went over Folau’s head and the Wallabies missed an opportunity to close the gap on the scoreboard and give themselves some extra time to apply more pressure.
The first phase play involved Tevita Kuridrani (B) as a straight decoy runner outside Cooper (A), Matt Toomua (C) moving wider with Adam Ashley-Cooper (D) coming from behind Cooper to receive a short ball in behind Kuridrani and inside Toomua.


The timing of the runs from Kuridrani and Ashley-Cooper, together with the pass from Cooper to Ashley-Cooper, was exquisite and it must have taken plenty of time during practice to get it that accurate.
The only error the Wallabies made was that Toomua (C) slightly overran Ashley-Cooper (D). If he’d retained a little more depth, Ashley-Cooper could have passed to Toomua before Ma’a Nonu tackled him.

The speed of the recycle of the ball from the ensuing ruck was so fast that the All Blacks didn’t have time to re-align in defence.
However, the pass from Cooper (A) was too high as he tried to get the ball over Israel Dagg (E) to Folau (F) and went into touch.

While it may not have resulted in a try, the re-emergence of first phase plays in the Wallabies’ attack is a decisive moment in their development of a more expansive game plan.
Refereeing calls
While I’d rather steer clear of controversy through retrospective looks at refereeing decisions, there were two poor refereeing decisions that I will discuss.
But before some of you start bashing away on your keyboard, let me say clearly that referees make mistakes, just as players do, the better team won the match and I don’t believe that refereeing decisions caused the Wallabies to lose.
Kieran Read’s try in the 54th minute, when the score was 33-26, really broke the match open.
It came from a turnover one minute earlier when James Slipper went into contact far too upright and with the ball out in front of him, where it made it easier for the All Blacks to latch on to it.
However, when Charlie Faumuina stole the ball, Slipper had gone to ground and with players in contact over the ball a ruck had formed.
Faumuina was not supporting his own body weight and at no time did he release Slipper before playing the ball.
A penalty should have been awarded to the Wallabies and, given referee Craig Joubert was very strict in policing these same infringements all match, it was a shame the one he got so wrong led to such a critical try.
Having said that, Slipper got caught upright and with the ball in front of him on two occasions in the match that led to turnovers, so needs to work on better body height in contact.
The decision to award a turnover against the Wallabies in the 63rd minute after a driving maul from the lineout puzzled even the New Zealand commentators.
Justin Marshall said, “I can’t agree with that…
“You don’t have to move much, you just have to be moving…
“That’s probably only stopped a maximum of once but certainly not twice.”
When you watch the replay closely the maul did stop momentarily when Joubert made the final ‘use it now’ call.
Under the laws, the first time the maul stops, you have five seconds to get it moving again. But once it stops a second time, you can’t start moving again – you must release the ball from the maul and the referee is required to give you reasonable time to release the ball.
On the replay you can clearly hear Joubert call “use it once” when the maul is first forming and later he went to Genia and called for him to “use it now”.
On the first call he allowed time for the Wallabies to get the maul moving again and on the second he required them to release the ball but gave them reasonable time to do so – both the calls were in accordance with the law.
As I’ve already said, I have no issue with the second call as the maul did stop momentarily and that’s all it has to do.
It’s like a stop sign – the road laws say you must stop, not nearly stop.
With a maul, if it stops at all the law comes into play – it’s irrelevant whether it only stopped for a short time or was about to start moving again.
Where Joubert got the call wrong was with his first call, which was made as the maul was forming.
At that stage the maul had not started moving forward, so when something hasn’t started moving, how can it then be deemed to have stopped?
In nearly every similar situation, referees allow a maul to form and then start moving forward but Joubert didn’t in this case and he was too hasty with that first call.
The second time the maul stopped in Joubert’s opinion should have been the first time in my opinion and therefore the Wallabies should have been allowed to move forward again.
The referee made two clear calls and whether they were right or wrong the Wallabies needed to play to the referee, not keep trying to maul the ball after the ‘use it now’ call was made.
Of course it’s easy for us to say that when we didn’t have our heads in a maul or have to deal with the crowd noise!