


- Video
-
Club Roar
Captured a great grassroots sporting moment? We want to see it!Content Collections
The Roar Community
- Join
- Login
The Waratahs played very well in beating the Brumbies on Saturday to lock up the Australian conference for 2014.
The ‘Tahs are playing some great rugby and look a really complete team. They have the x-factor stars, they have the hard workers and they have size and power.
If you’ve followed The Roar tipping competition this year you’ll know I’m a terrible tipper when it comes to Super Rugby. However, I have been tipping the Waratahs to win the Australian conference in articles on The Roar since August last year.
When making that tip I didn’t take it further with a prediction on whether the ‘Tahs could actually win the competition but I think they can. However, they need to win their last two matches in order to guarantee an all important top two spot or it could be tough.
The ‘Tahs have been particularly good this year with their execution of attacking plays, both in the forwards and backs.
Getting the execution of plays right takes planning, skill and lots of hard work on the training field. It also requires good decision making. The little details are so important to get the execution right.
In Saturday’s match there were a number of examples of good execution and I’ve chosen two from the ‘Tahs I want to look at today.
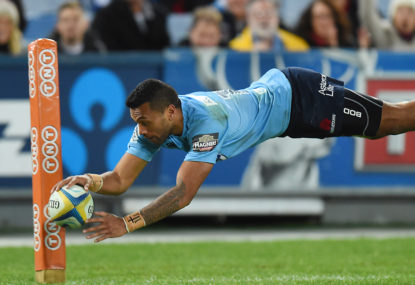
The first was in the lead up to Bernard Foley’s try in the 61st minute, which came on the second phase after a lineout ten metres out from the Brumbies try line.
The forwards took the ball down from the lineout and made around eight metres with a drive which the Brumbies defended poorly.
At the ensuing ruck Ruaidhri Murphy failed to roll away quickly which slowed the release of the ball from the ruck. Steve Walsh called an advantage for a penalty against Murphy but the ‘Tahs wanted to continue as they were set up for a play off Foley.
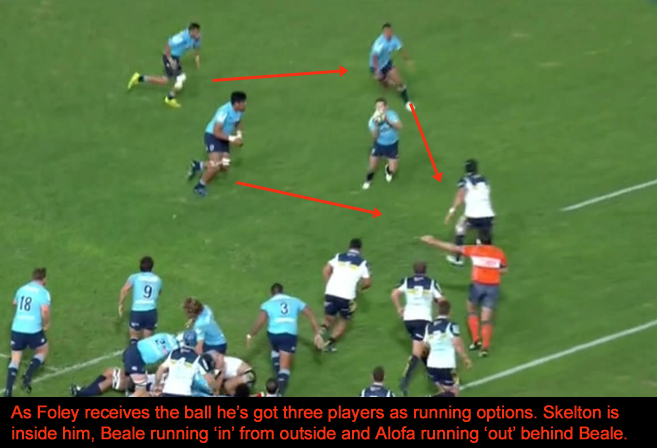
When Foley received the ball he had multiple running options around him which made it really hard for the Brumbies defence as did their lack of defensive numbers in front of Foley.
Ben Mowen had players running towards him from all directions and Foley forced him into a decision to focus on Skelton with a nice little dummy inside.
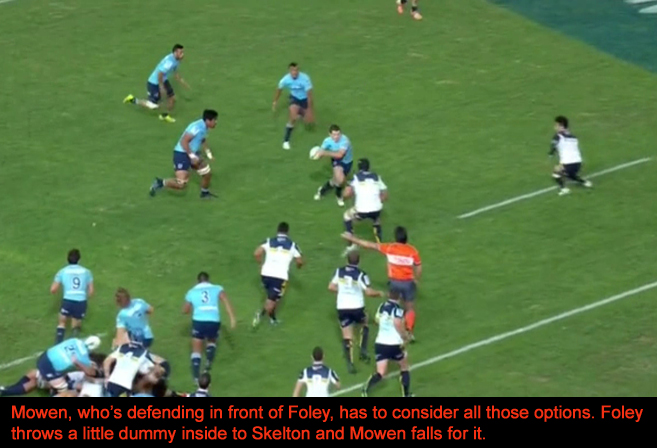
The three runners in Mowen’s eye line were hard enough to deal with but the other option was Foley himself.
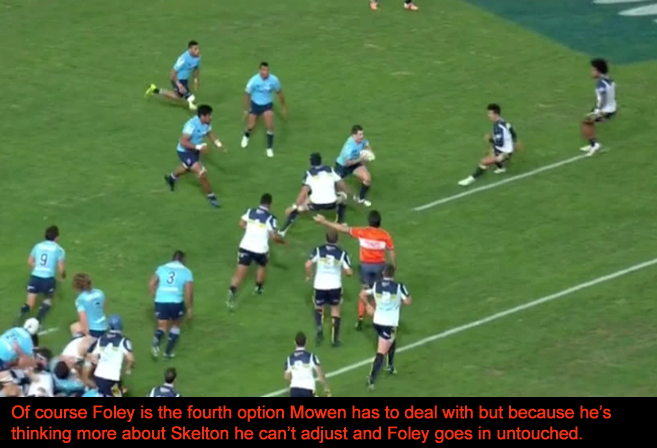
Foley may have scored the try by just catching the ball and running directly outside of Mowen but the little detail in that inside dummy sealed the deal.
The second play came in the 69th minute in the lead up to Alofa Alofa’s second try. On Thursday I’ll publish my 3D analysis of the workings of this try but today I want to concentrate on one little detail early in the play.
Again, the ‘Tahs have multiple options for Foley to work with.
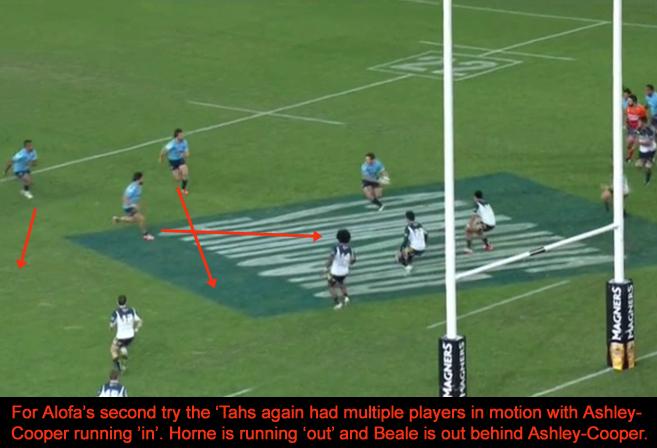
While Rob Horne appears not to play much of a role in this try he is an option that the defence will have to keep watching.
Horne knows he’s not going to get the ball and it would have been very easy for him to just jog through running a decoy line as the ball was passed across him to Kurtley Beale.
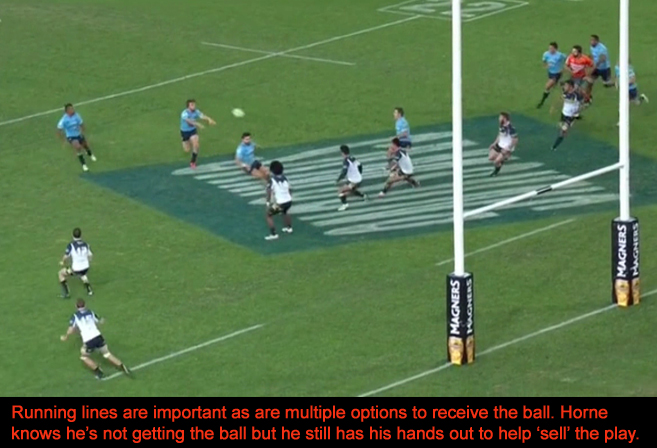
The fact that he’s got his hands out looking like he could receive the ball would have caused the defenders to take a second look at him.
It’s all well and good to run a decoy line but you have to run as though you’re going to receive the ball – that means accelerating towards the line, having your hands up and calling for the ball. Those little details help to ‘sell’ the play to the opposition.
Of course decoy runners should also be an option to receive the ball if the play maker sees they’re a better option than what was originally planned.
If the decoy runner doesn’t have their hands up they aren’t an option for the play maker to pass to but all too often players don’t get this little detail right.
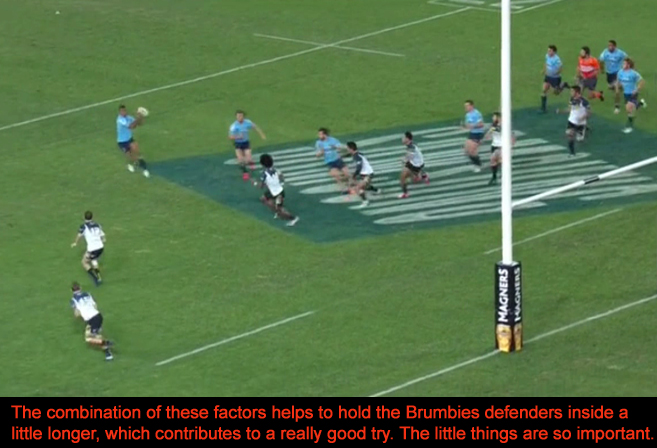
As it tuned out Horne didn’t receive the ball but he played his part well.
Finally, here’s an example from the Brumbies where the little details weren’t right and as a result the execution was poor which led to a decisive moment in the match.
In the 18th minute on the second phase after a lineout the Brumbies ran a wide play. There was actually space outside of the ‘Tahs defensive line and with Robbie Coleman and Jesse Mogg in the wide channel there was an opportunity for the Brumbies.
Rodney Iona was making his Super Rugby debut off the bench and was called on early when Tevita Kuridrani went off with a concussion. He would have had limited time to prepare with the players around him making it a tough gig.
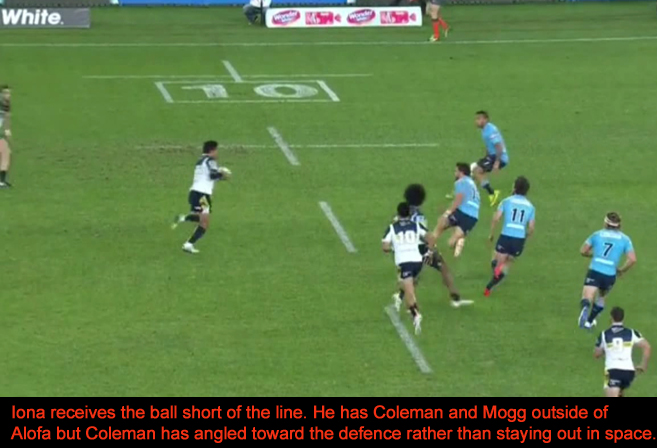
Iona wasn’t helped by the line Coleman ran angling in towards the defence. I’m not sure if this line was part of the plan but the space was outside Alofa and Coleman needed to stay out wider to give Iona the option to pass wide.
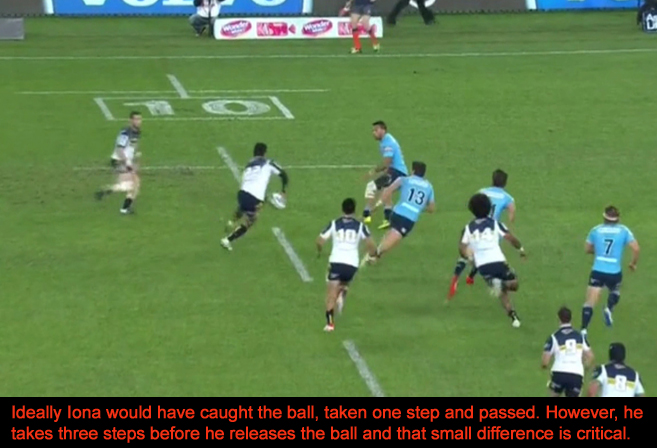
The difference between one step and three steps is all it took for Iona to get too close to the defensive line so that when he did try to make a pass, Alofa was close enough to attempt the intercept play.
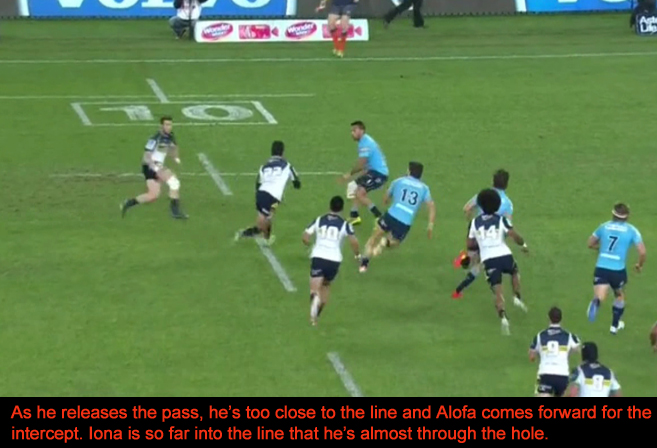
It was a close but it looks like Iona could have accelerated into the hole between Ashley-Cooper and Alofa without needing to make the pass. We’ll never know whether he was in space or not or where the Brumbies could have taken this play if the pass had been made early.
As it was Alofa ran away to increase the ‘Tahs lead and put the Brumbies well and truly on the back foot.