


- Video
-
Club Roar
Captured a great grassroots sporting moment? We want to see it!Content Collections
The Roar Community
- Join
- Login
It was definitely not an All Black-beating performance. It may not have been enough to beat England. But the Wallabies’ showing at Suncorp was the right medicine at the right time, and it was enough to disperse the losing virus. (Click to Tweet)
There were a sufficient number of encouraging signs within the performance to suggest that the improvement will continue for the remainder of this year’s Rugby Championship, and that Michael Cheika can advance with the core of this team to the end of the tournament.
Most of what the Wallabies did was solid and sensible, and there were very pleasant upswings in a number of areas in which there have been persistent problems.
Issues with both the lineout and exit strategy were addressed.
Exit strategy
The exit strategy shifted from 10 to 9, with Will Genia shouldering most of the responsibility for clearing from the Wallabies’ own end. As the first two clips show, Genia was able to consistently find touch near halfway and relieve the pressure immediately from both restarts (11:30) and lineouts (15:30).
Towards the end of the first half, the Wallabies felt confident enough to vary by running back out of their own 22-metre zone, with both Quade Cooper and Bernard Foley throwing long passes to release Israel Folau on the outside to create extra room for the clearance (35:30).
The strategy of kicking to touch also demonstrated some excellent joined-up thinking by the Wallaby coaching group, because they linked the exit strategy with a definite plan to counter the Springboks driving lineout, as we will see below.
Own ball lineout
Surprisingly, the Wallaby coaches handed the lineout calling over to Adam Coleman rather than Dean Mumm, and Coleman made a pretty good fist of the job, with Australia winning 10 of 13 lineouts on their own throw for a 77% return. Two of the losses occurred after Coleman had won first touch (19:27 and 36:41) while the third was a miss-call with replacement hooker Tatafu Polota-Nau hitting front lifter Rory Arnold in the small of his back (55:11)! There were a couple of other loose flaps at the ball, but in general some reasonably sturdy foundations were laid.
The most significant aspect of the Australian lineout, apart from Coleman moving into the lineout captaincy role, was the emergence (finally) of #4 Kane Douglas as an option at the front. Douglas had won less than one ball per game over the course of the World Cup and the first two games of this year’s Rugby Championship. At Suncorp on Saturday, he won four throws, more than either Mumm or Coleman himself.
As the clips illustrate, the Springboks concentrated their main counter-jumpers (4 Etzebeth, 5 de Jager and 8 Whiteley) towards the middle/tail of the line. At 21:59 the ‘Beast’ is angled up the line to lift for Eztebeth in the middle, at 26:22 Douglas is available for the drop throw with both Springbok jumping pods clustered in the back half of the line. This represented both sensible pre-game preparation and sound calling choices by Coleman during the match itself.
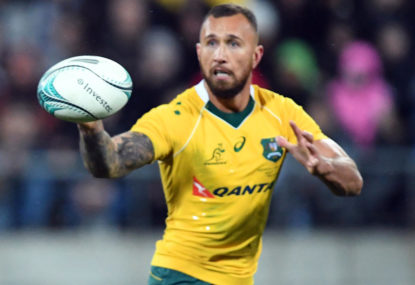
The Cooper-Kerevi connection
On the attacking front, the most pleasant development was the obvious rapport between 10 Quade Cooper and 13 Samu Kerevi – a connection which can surely only be grown and refined by their presence together in the Reds’ 2017 Super rugby midfield.
In the first example, after Israel Folau receives the high ball at 16:37, Cooper is hovering for the offload as Kerevi regroups into the far 5 metre corridor. After passing to Kerevi, Cooper is there in close support to receive the return ball and set up the position from Australia should have scored at 16:53.
Instead Bernard Foley gave up the interception which South Africa returned for a score and a 14-point turnaround.
At 33:07 after another kick on to Folau, Cooper and Kerevi are again around the ball waiting to feed off the offload, with Cooper flipping the no-look pass behind his back to set Kerevi free down the left.
The final example occurred right at the beginning of the second period, with Cooper drawing the ‘eyes’ of the defence on to him before delivering the money-ball, an inside pass to Kerevi for the clean break at 40:28.
The improvements in the thinking and execution on defence were even more clear-cut:
Lineout defence structure – backs
A couple of weeks ago in this article, I observed a weakness in the Wallaby lineout defence pattern, with Dane Haylett-Petty on the open-side wing and Quade Cooper defending in the backfield on the blind-side. It looked like this:

The issues with this structure are that it delivers a natural front-line defender (Cooper or Foley) in the backfield, and a natural backfield defender (Haylett-Petty) in the line.
The Springbok game saw the right changes made, with Cooper swapping over with Haylett-Petty to defend on the open-side wing, and the Force full-back fulfilling the blind-side wing/ auxiliary full-back role.
The first sighting of this new formation was at 1:14:

In contrast to the second Bledisloe match at Wellington, the two-deep backfield zone of Folau and Haylett-Petty did not cough up a single high ball receipt all game:


Nor did Quade Cooper look out of place defending outside Samu Kerevi at every lineout. At 20:36 he comes up intelligently to cut off the wide pass by Elton Jantjies and the ‘Pooper’ duly wins the contact situation when Jantjies is forced to turn back inside. At 30:35 he has Johann Goosen well-covered in the 5 metre corridor when the Boks try to move the ball to the far side-line.
Lineout defence structure – driving maul.
The Wallabies also had a plan for what is traditionally, the biggest single threat in the South African attack: the driving maul from lineout. On three occasions, Australia employed the ‘back-off’ method which involves a high percentage of risk (see clips at 6:04, 43:30).
The idea behind this method is for the forward defenders (bar one) to take a step away from the line as the opponent catches the ball and refuse engagement. If the opponent then transfers the ball to the back of the maul and tries to advance, it is obstruction. At the same time there is no offside line, so one of the defenders is free to circle around the blockers and sack the ball-carrier.
This is in fact what happens in the first instance, with Sekope Kepu sacking Francois Louw, and referee Nigel Owens awarding Australia a penalty for obstruction. On the second occasion at 43:40 the Springboks keep the ball at the front on the receiver Pieter-Steph du Toit, but make a handling error as they burst through the line.
Although the Boks finally got it right in the 64th minute of the match, with du Toit breaking clear up the middle for a 20 metre gain past the back-pedalling Australian forwards, I believe that the overall outcome of one penalty and one turnover for, against one clean break conceded, is a result Australia would have readily accepted before the game started.
Commitment to the defensive breakdown
Last week’s article noted how play was balanced on a knife-edge in situations where Australia committed a third player to defensive breakdowns (tackler plus two other defenders) in the Sydney Test. Even though this only occurred at 18 rucks out of the 100 built by the All Blacks, those 18 situations yielded:
• 7 Wallaby turnovers
• 5 clean breaks (on next phase) and two penalties to New Zealand.
14 out of the 18 events had decisive outcomes when Australia went ‘all in’ at the breakdown, and despite the large proportion of turnovers it did not turn out well for the Wallabies, with two of the clean breaks being converted into tries.
The conclusion to the article stated:
If Australia can pick their moments to up the stakes – perhaps limiting their counter-attacking ventures to times when two of their top jackaling group of Pocock, Hooper, Fardy and Ashley-Cooper are on the ball – they would become more efficient in the on-ball/line numbers balance, and start getting on the right side of referees once more.
Against the Springboks this is exactly what the Wallabies achieved. The penalty count at the defensive breakdown dropped from six to three overall, and those drawn by the key duo of Hooper and Pocock dropped from three to one.
Moreover, the relationship between Stephen Moore and Nigel Owens was noticeably less fraught than it had been between Moore and Jaco Peyper or Romain Poite.
Australia discovered they could turn the ball over anyway, without having to commit so many players to the tackle area. They left it to the experts for the most part, to Michael Hooper and David Pocock.
In the clips,
• On first phase at 12:13, Australia achieve the slow-down with only Hooper and Pocock committed. Only the tackler is involved at the second ruck (Adam Coleman), giving the Wallabies excellent numbers in the line when Scott Sio forces the fumble out of Oupa Mohoje at 12:27.
• At 20:40 Hooper and Pocock are sufficient to engineer the (temporary) turnover on first phase, with tackler Samu Kerevi already well clear of the contact area – just like Reece Hodge in the first example. Australia commit only the tackler to the next two phases and have 13 players on their feet in defence at 21:02. This represents a clear ‘win’ for the defence. The sequence ends with a Wallaby penalty when ‘Beast’ Mtawarira dangerously neck-rolls Pocock at a one-on-one cleanout (21:12).
• The process is repeated at the lineout sequence from 30:25-30:45, with only the tackler committed to the breakdown until Pocock gets his shot at the turnover at 30:45.
• As if to nail down the point, “+1 is enough” at 72:30, with Pocock getting off the ground as the tackler to protect Hooper’s jackal close to the Australia goal-line.

The work-on’s – #12 and the Cooper-Foley relationship
The only outstanding negative issue at Suncorp was the presence of Bernard Foley at #12 and the continued awkwardness of his relationship with Quade Cooper at outside-half:
Although he is fighting hard to do the business and there is clearly no ‘quit’ in his attitude, Foley’s empathy for the game (and the game’s empathy for Foley) has temporarily deserted him.
As the reel shows, Foley is making errors on his own – the two interceptions plus the man-and-ball pass which results in a Bryan Habana turnover penalty – and there are still too many occasions where he and Cooper seem to be competing for the same space rather than playing complementary roles.
• The intercept errors at 16:52 and 56:32 are essentially one and the same play. Foley has a scoring overlap at 16:53 but takes one step too many and the ball is intercepted by Springbok captain Adriaan Strauss. South Africa have been using this ‘fish-hook’ pattern in midfield for a number of years, with a single defender shooting out and squaring his shoulders inwards to the side-line to cut off the width of the field. It used to be Jean de Villiers’ role, now it belongs to Strauss.
He does it twice and it costs Australia seven points of their own, while gifting the same number of points to South Africa. Foley then fails to ‘see’ the late spot-blitz by Habana at 67:33 before delivering a hospital pass to Cooper, which South Africa are able to convert into a full turnover penalty via Habana’s on-ball contest.
• There were three examples of the lack of complementary attributes in the Cooper-Foley partnership. At 4:58 Foley makes a neat half-break between two Springbok forwards but, as Rod Kafer notes in TV commentary this is one of the times where either the 10 or the 12 have to do the spade work and clean out for one another. In the event, Foley isn’t strong enough to change his position on the ground at presentation, and Cooper isn’t strong enough to remove Faf de Klerk on the jackal.
Foley, Cooper and Israel Folau start in a long “I” formation directly behind the set-piece at an attacking midfield scrum:

In the clip from 13:40-14:00, all three then switch to the far side with Folau receiving the ball and both Foley and Cooper consumed in the first cleanout at 13:43! This leaves the Wallabies without a backs first receiver for the next two phases at 13:47 and 13:57, with Cooper still 20 metres adrift of the play as Kerevi is tackled and robbed at 14:00.
The final instance at 74:13 is a repeat of the discomfort we saw at Wellington. As a sequence of pick plays develops, Foley first tries to push Cooper out of his space at 74:15 before Quade passes on the ‘nudge’ to Folau on the other side of the play a moment later! These are the actions of two players who naturally occupy the same space on the field and there is little sense of positive co-operation.
Summary
There were enough positive developments at the Suncorp to enthuse both the coaches and Wallaby supporters alike. The exit strategy was simple and solid, and Adam Coleman showed some promise as a leader of the lineout. The signs of an innate midfield understanding between Quade Cooper and Samu Kerevi also bode well for Australia’s attack in future.
On defence, the dual backfield of Folau and Haylett-Petty were rock-solid under the high kicking game, while Cooper looked far more comfortable as a line defender than he did plugging backfield leaks in Wellington.
Discipline at the breakdown was vastly improved and Hooper and Pocock were able to do their strong technical work in that area without recourse to the costly breakdown floods in Sydney. Stephen Moore’s relationship with the referee was far easier as a result!
The 10-12 partnership however remains an on-going issue. There is little sense of either mutual enthusiasm or complementary role-playing between Quade Cooper and Bernard Foley, and Foley still looks like he needs a rest from the front line. Promoting either Reece Hodge or Kyle Godwin into 12 and bringing Drew Mitchell on to the left wing is a nice thought, although it’s more likely that Michael Cheika will call ‘stick’ and select the same starting XV for Argentina.