


Cats beat Bombers in last pre-season hit-out
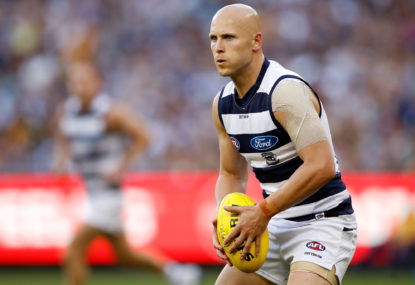
The Joel Selwood-led Geelong Cats have defeated the Essendon Bombers by 28 points on Thursday night at GMHBA Stadium. The Cats kicked 15.11 (101)…


Roar Guru
Joined December 2013
52.9k
Views
27
Published
1.1k
Comments
I work at ABC Regional as a Digital Producer. My most memorable match I have seen was in Round 5, 2003: Hawthorn vs Richmond at the MCG. The Tigers were down by 54 points, and came back to win by 20. It was an amazing game to see in one of my first games at the sacred ground.
Published
Comments
The Joel Selwood-led Geelong Cats have defeated the Essendon Bombers by 28 points on Thursday night at GMHBA Stadium. The Cats kicked 15.11 (101)…
The second week of the JLT Community series continues with a Thursday night clash between Geelong Cats and Essendon Bombers at GMHBA Stadium. Join…
Port Adelaide Power have given their finals credentials a major boost with a ten-point win over the Melbourne Demons on Friday night at Adelaide…

The last week of bye rounds sees another Friday night fixture for Port Adelaide Power hosting the Melbourne Demons at Adelaide Oval. Join The…
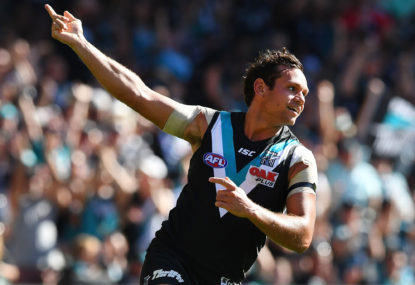
Port Adelaide Power have boosted their finals credentials with a 14-point win over the reigning premiers, Richmond Tigers at Adelaide Oval on Friday night.…

The first match of the bye rounds begins with Port Adelaide Power hosting the Richmond Tigers at Adelaide Oval. Join The Roar for live…

The North Melbourne Kangaroos have stunned the Hawthorn Hawks with a win by 28 points in front of 27,981 at Etihad Stadium on Sunday.…

Match result: The North Melbourne Kangaroos have stunned the Hawthorn Hawks with a win by 28 points in front of 27,981 at Etihad Stadium…

The Australian Opals have smashed Mozambique 113-53 in their first preliminary matchup of the Commonwealth Games at Townsville Entertainment and Convention Centre. While there…
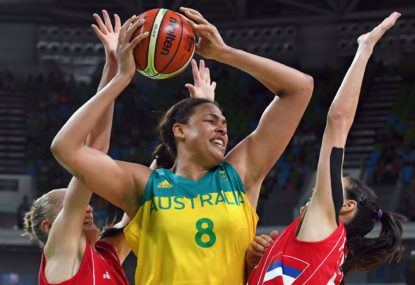
The Australian Opals will open their account in the Commonwealth Games tonight against a young Mozambique at the Townsville Entertainment and Convention Centre. Join…
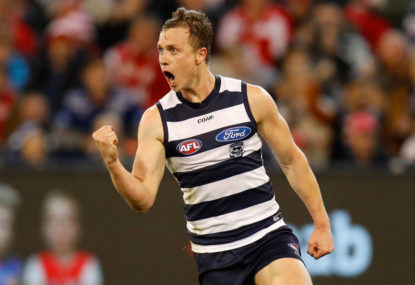
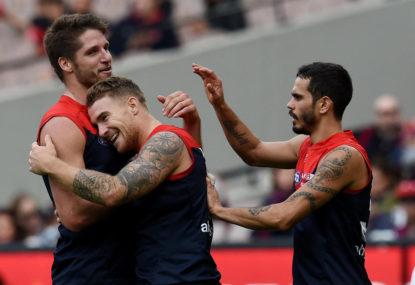
The Geelong Cats have won a thriller by three points after a see-sawing affair at the MCG on Sunday ended with a missed shot…

Match result: The Geelong Cats have won a thriller by three points after a see-sawing affair at the MCG on Sunday ended with a…

The Gold Coast Suns have begun their new direction under rookie coach Stuart Dew in style, with a 56-point win over the Geelong Cats…

Match result: Gold Coast have gotten the Stuart Dew era off to a good start on Sunday with a 56-point win over Geelong in…
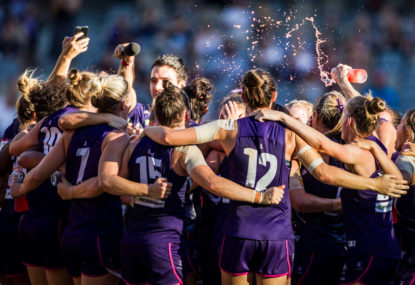
The Fremantle Dockers have caused an upset at home in the AFLW by defeating the Melbourne Demons by five points in their first ever…

Match result: Fremantle have upset Melbourne's applecart, with an excellent display of accurate kicking in front of goal leading them to a five-point victory.…
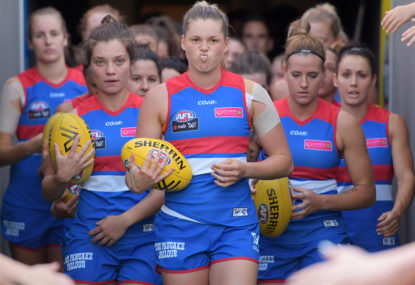
The Western Bulldogs have begun their 2018 AFLW campaign in style with an emphatic 26-point win over the Fremantle Dockers at VU Whitten Oval.…

Match result: The Western Bulldogs have begun their 2018 AFLW campaign in style with an emphatic 26-point win over the Fremantle Dockers at VU…
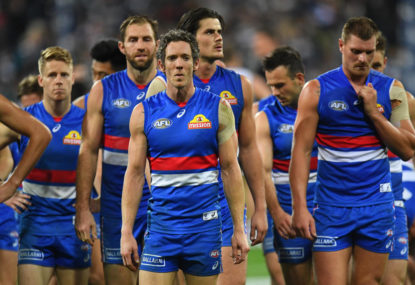
The Melbourne Demons have smashed the Western Bulldogs by 57 points at Etihad Stadium to move into fifth on the ladder and send the…
The last match of the bye rounds sees the Western Bulldogs host a fired up Melbourne Demons at Etihad Stadium. Join The Roar for…
Behind
4:59 – The first behind of the quarter comes to Jesse Hogan after a snap on his right around his body.
Port Adelaide: 8.6 (54)
Melbourne: 9.9 (63)
Port Adelaide Power vs Melbourne Demons: AFL live scores, blog, highlights
Goal
8:36 – Boak centres the ball and Westhoff takes a big strong grab 15 metres out. He slots it. It’s goal-for-goal at the moment.
Port Adelaide: 8.6 (54)
Melbourne: 9.8 (62)
Port Adelaide Power vs Melbourne Demons: AFL live scores, blog, highlights
Goal
9:39 – Melksham gets a mark on the 50m and goes long to Tom McDonald 20 metres out. He looks to hold up, then runs on, thinks about the pass but slots it instead. Almost a stuff-up but a great result for his 3rd goal. 8-straight goals this quarter.
Port Adelaide: 7.6 (48)
Melbourne: 9.8 (62)
Port Adelaide Power vs Melbourne Demons: AFL live scores, blog, highlights
Goal
10:11 – Dixon bends it around on his left and snaps the banana!
Port Adelaide: 7.6 (48)
Melbourne: 8.8 (56)
Port Adelaide Power vs Melbourne Demons: AFL live scores, blog, highlights
10:11 – Ryder takes a grab on the 50m and goes for the shot … it tucks away to the right and Dixon marks.
Port Adelaide: 6.6 (42)
Melbourne: 8.8 (56)
Port Adelaide Power vs Melbourne Demons: AFL live scores, blog, highlights
Goal
12:12 – Robbie Gray … slots it! Champion player.
Port Adelaide: 6.6 (42)
Melbourne: 8.8 (56)
Port Adelaide Power vs Melbourne Demons: AFL live scores, blog, highlights
Free Kick
12:44 – Robbie Gray gets a free kick for high contact inside 50. Will go back for a set shot to settle the scoreline.
Port Adelaide: 5.6 (36)
Melbourne: 8.8 (56)
Port Adelaide Power vs Melbourne Demons: AFL live scores, blog, highlights
INJURY NEWS:
Todd Marshall on the bench with a shoulder injury.
Port Adelaide Power vs Melbourne Demons: AFL live scores, blog, highlights
Goal
14:45 – Salem slams another one on his boot and the Demons are starting to get away. A 20-point lead and making the most of their inside 50s.
Port Adelaide: 5.6 (36)
Melbourne: 8.8 (56)
Port Adelaide Power vs Melbourne Demons: AFL live scores, blog, highlights
Goal
15:50 – Melksham gets a shot on the run 40 metres out and the Dees are away.
Port Adelaide: 5.6 (36)
Melbourne: 7.8 (50)
Port Adelaide Power vs Melbourne Demons: AFL live scores, blog, highlights
Goal
16:36 – Tim Smith nails one at the other end from a set shot and the Dees are back out to an 8-point-lead.
Port Adelaide: 5.6 (36)
Melbourne: 6.8 (44)
Port Adelaide Power vs Melbourne Demons: AFL live scores, blog, highlights
Goal
17:47 – Robbie Gray with the dribble goal after passes from Boak to Wingard to a tap-on from Thomas.
Port Adelaide: 5.6 (36)
Melbourne: 5.8 (38)
Port Adelaide Power vs Melbourne Demons: AFL live scores, blog, highlights
INJURY NEWS:
Sam Gray running the boundary coming out late of the change rooms. Reports of the flu during the week.
Port Adelaide Power vs Melbourne Demons: AFL live scores, blog, highlights
Goal
18:21 – Hannan gets the first score of the second half with a boot to the ball off the ground in the goal square thanks to the Melksham entry.
Port Adelaide: 4.6 (30)
Melbourne: 5.8 (38)
Port Adelaide Power vs Melbourne Demons: AFL live scores, blog, highlights
Half Time
STATS:
Dees lead disposals 176-172, Free kicks 17-11, clearances 28-15, inside 50s 39-17, and contested possessions 83-73, while Port lead tackles 46-44, hitouts 29-22.
Disposals:
PORT: Jonas (13), Polec (13), Wines (12), Rockliff (12).
DEES: Brayshaw (16), Viney (15), Oliver (12), Jones (11)
Goals:
PORT: Ebert (2), Wingard, Boak.
DEES: T.McDonald (2), Hannan, Petracca.
Port Adelaide: 4.6 (30)
Melbourne: 4.8 (32)
Port Adelaide Power vs Melbourne Demons: AFL live scores, blog, highlights
Half Time
00:00 – That wraps up the half and a squabble in the centre breaks up the pack. Dees lead by 2 in what’s been a scrappy first half.
Port Adelaide: 4.6 (30)
Melbourne: 4.8 (32)
Port Adelaide Power vs Melbourne Demons: AFL live scores, blog, highlights
Behind
00:06 – Lindsay Thomas gets a mark 40m out in front of goal. Not much time left on the clock here for the half. The number 48 misses to the right.
Port Adelaide: 4.6 (30)
Melbourne: 4.8 (32)
Port Adelaide Power vs Melbourne Demons: AFL live scores, blog, highlights
Depends on how you look at it. I agree the shoulder was there, and a free kick could be paid. Thought the 50m penalty was harsh though considering the circumstance of not being able to pull away.
Port Adelaide Power vs Melbourne Demons: AFL live scores, blog, highlights
Behind
3:23 – Gawn picks up the ball inside forward 50 and snaps on his right. It hooks back, but it’s a behind.
Port Adelaide: 4.5 (29)
Melbourne: 4.8 (32)
Port Adelaide Power vs Melbourne Demons: AFL live scores, blog, highlights
Goal
3:49 – A free kick and advantage paid after everyone stopped flat-footed. Motlop takes a run through the centre of the ground and hits up Travis Boak in front of goal on the run. Boak slots it with ease from a set shot 20m out.
Port Adelaide: 4.5 (29)
Melbourne: 4.7 (31)
Port Adelaide Power vs Melbourne Demons: AFL live scores, blog, highlights
Behind
5;30 – Tim Smith goes long from the boundary as he looks for an option but it’s punched through for a behind.
Port Adelaide: 3.5 (23)
Melbourne: 4.7 (31)
Port Adelaide Power vs Melbourne Demons: AFL live scores, blog, highlights
50-metre Penalty
6:03 – Power get a short 50 from the backline.
Port Adelaide: 3.5 (23)
Melbourne: 4.6 (30)
Port Adelaide Power vs Melbourne Demons: AFL live scores, blog, highlights
He was in the air already. Hard to pull out of your position from there.
Port Adelaide Power vs Melbourne Demons: AFL live scores, blog, highlights
Goal
6:22 – Tom McDonald snaps around his body and gets another on the board. Dees respond well with a goal.
Port Adelaide: 3.5 (23)
Melbourne: 4.6 (30)
Port Adelaide Power vs Melbourne Demons: AFL live scores, blog, highlights
Behind
3:38 – Another behind, this time rushed over for Port.
Port Adelaide: 8.7 (55)
Melbourne: 9.9 (63)
Port Adelaide Power vs Melbourne Demons: AFL live scores, blog, highlights