


- Video
-
Club Roar
Captured a great grassroots sporting moment? We want to see it!Content Collections
The Roar Community
- Join
- Login
Last week I used my new 3D rugby analysis model to look at a great try scored by the Wallabies in the first Test against France.
In the second Test there was no try to analyse so I’ve looked at two other areas of play – some try-saving scrambling defence and decision making in relation to kicking.
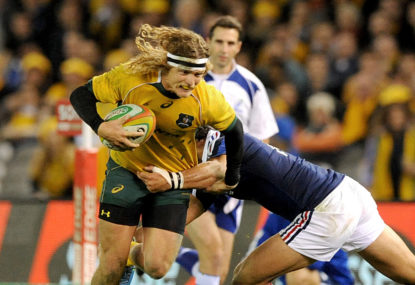
The first play I’ve looked at occurred in the fourth minute when Matt Toomua combined well with Nick Cummins to save a try after some soft Wallabies defence allowed the French to get on a roll.
While it was very early in the match, it was a fantastic opportunity for France to post the opening points and was their best opportunity in the match. The fact that Toomua managed to shut down the French attack turned out to be a match winning effort, although we didn’t know it at the time.
The key elements in this defensive effort were communication and trust between Toomua and Cummins. As you’ll see in the video, Cummins has to push out to his opposite winger to take him out of the play as an option to receive a pass.
Easy enough to say ‘he just did what any good winger would do’ when we’re watching from the stands or on a television screen. However, when it’s all happening around you very quickly the split-second decision to stay in and target the ball carrier or push out is not an easy one.
We’ve seen plenty of wingers get this decision wrong at both Super Rugby and Test level.
Essentially Cummins had to trust that Toomua would be able to make the tackle on the ball carrier inside. If Toomua doesn’t make that tackle, there would be some who would say Cummins should have stayed in on the ball carrier.
In my opinion Cummins makes exactly the right decision.
Then Toomau goes to work, not only making the tackle but then securing a turnover.
The second area I looked at is not as positive.
Those who say the Wallabies level of kicking in the second Test wasn’t excessive are in the small minority. I’m not one of them and this opportunity I’ve looked at is a perfect example where I think the kick was the wrong option.
However, the purpose of this analysis is not to debate that point but to look at the decision making of where to kick the ball once that decision to kick had been made.
If you were watching the match on Fox you would have heard Rod Kafer talk about the space in behind the French defensive line as they keep both their wingers up in a full defensive line. That comment related to an opportunity in the tenth minute but the Wallabies were penalised at the scrum so we’ll never know what they had planned from that particular play.
The next opportunity came ten minutes later from almost the exact same position and this time the Wallabies did win the scrum.
When you watch the analysis you’ll see that I think there was only one place on the field where it wasn’t an option to kick the ball – where the French fullback was standing.
However, that’s exactly where Foley kicked to.
I can’t explain what he was thinking with this kick – it doesn’t look like it’s a miss-kick and I can’t believe he didn’t see the French fullback in the back field.
If he had tried to kick a high ball you could argue he was trying to give Israel Folau an opportunity to chase through and win a jumping contest. But he appears to deliberately keep the ball low with this kick.
It was a poor decision and a terrible waste of possession.