


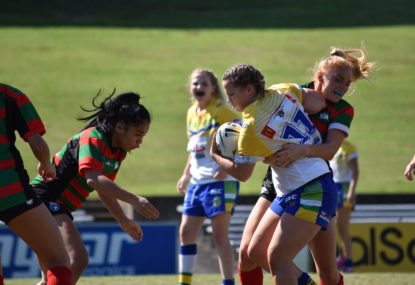
NSWRL junior representative grand final recap
Grand final day at Leichhardt Oval had it all. Famous surnames, half-field tries, thrilling finishes. You name it, the NSWRL's premier day for the…

Roar Guru
Joined January 2016
54.9k
Views
40
Published
896
Comments
A University of New South Wales graduate in journalism with experience covering and photographing professional and local Rugby League, Basketball, AFL and Horse Racing. Twitter - @seanteuma Instagram - @seanteuma Facebook - @seanteumajournalist
Published
Comments
Grand final day at Leichhardt Oval had it all. Famous surnames, half-field tries, thrilling finishes. You name it, the NSWRL's premier day for the…
New South Wales have announced the squads for the junior interstate matches to be played against Queensland. The under 18s match will be played…
Malta and Lebanon have named their squads ahead of the upcoming Phoenician Cup clash at New Era Stadium, Cabramatta on Saturday night. The match…

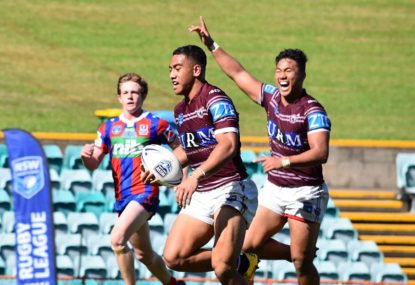
A thrilling weekend of junior representative action in the preliminary finals has seen six teams seal a grand final berth. Harold Matthews Cup Manly…
You wouldn't expect a training session at Merrylands Oval on a Wednesday night to mean much. In the distance, there was people having a…
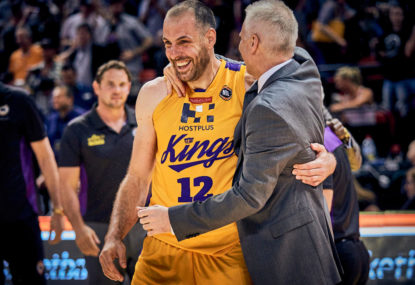
The Sydney Kings have been active in the market during the NBL off-season, and their quest for a roster that can take them to…
The squads for the inaugural Women's City versus Country Origin fixture have been announced today, with the momentous clash set to take place at…
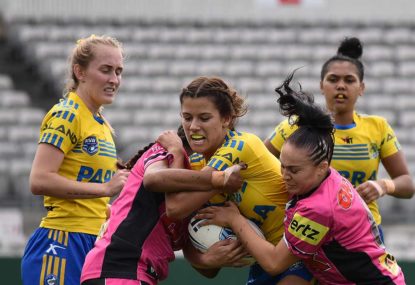
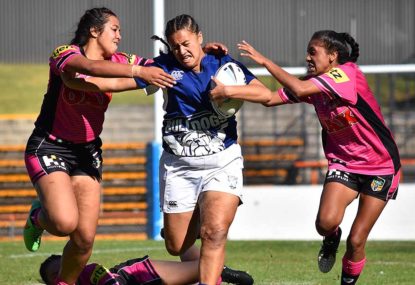
A clinical display from start to finish has seen the Penrith Panthers keep their Tarsha Gale Cup dream alive, thumping the Parramatta Eels by…
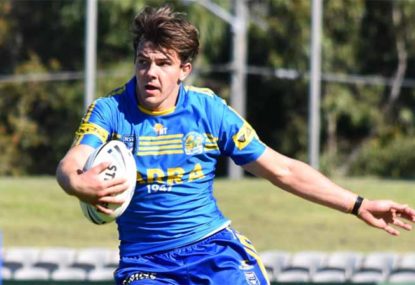
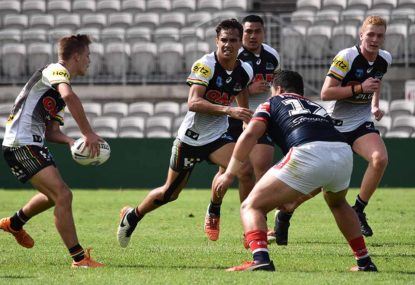
The Sydney Roosters have thwarted a late surge from the Penrith Panthers to prevail 22-18 in their SG Ball semi-final at UOW Jubilee Oval.…
The Sydney Kings have continued their pro-active approach to the NBL off-season by announcing the signing of power forward Dane Pineau today. Pineau returns…
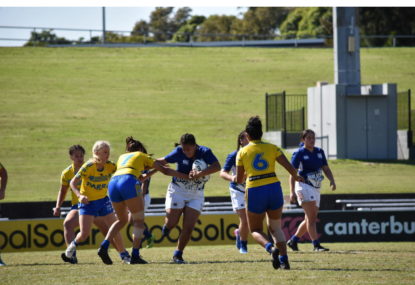
The Canterbury Bulldogs are through to the preliminary finals of the inaugural Tarsha Gale Cup after a 32-16 victory over the Parramatta Eels at…
The Canberra Raiders have progressed to the semi-finals of the Tarsha Gale Cup, defeating the South Sydney Rabbitohs 30-18 at the Belmore Sports Ground.…
A clinical display has seen the Cronulla Sharks continue their unbeaten run to start the SG Ball season, proving too strong for the West…
Jason Cadee has enjoyed a successful NBL career to date. Since joining the Sydney Kings in the 2014/15 season, Cadee hasn’t missed a game,…

The Adelaide 36ers continued their hot run of form, dismantling an undermanned Sydney Kings outfit 87-73 at Titanium Security Arena. Despite a hot start…
A stunning fourth quarter surge has seen the Sydney Uni Flames consolidate second spot on the WNBL ladder with a convincing 90-78 win over…
A mammoth second-half defensive effort has seen the Sydney University Flames score an upset 82-67 win over the ladder-leading Dandenong Rangers at Bryden's Stadium…
The Sydney Kings produced a stellar final quarter to take down the Cairns Taipans 86-78 at the Cairns Convention Centre last night. Sydney trailed…
The Sydney Kings have responded to consecutive losses, coming away with a crucial 99-93 win over the Illawarra Hawks at the WIN Entertainment Centre.…
The Sydney University Flames have come away with a stirring victory over the Bendigo Spirit, defeating the current ladder leaders by 93-86 in an…
There was a noticeable drop in the third quarter, however it’s picked up a touch in the last 10-15 minutes.
Hawthorn Hawks vs Adelaide Crows highlights: AFL live scores, blog
BEHIND HAWTHORN
Q4 – 10′
The ball is tied up after Mitchell was searching for a man inside 50. Hawthorn receive a free kick for a kick out on the full from 50 out. It is rushed through for a behind however.
HAWTHORN 14.9 93
ADELAIDE 16.6 102
Hawthorn Hawks vs Adelaide Crows highlights: AFL live scores, blog
GOAL ADELAIDE
Q4 – 11′
Lever took the mark inside 50, but caught the defence napping, gave it off to Seedsman, who finishes the job. Adelaide up by 10 now.
HAWTHORN 14.8 92
ADELAIDE 16.6 102
Hawthorn Hawks vs Adelaide Crows highlights: AFL live scores, blog
BEHIND HAWTHORN
Q4 – 12′
The kick never looked likely, hanging out to the right.
HAWTHORN 14.8 92
ADELAIDE 15.6 96
Hawthorn Hawks vs Adelaide Crows highlights: AFL live scores, blog
Q4 – 12′
Hawthorn are now within a kick, as Gunston will have a kick from just inside 50.
HAWTHORN 14.7 91
ADELAIDE 15.6 96
Hawthorn Hawks vs Adelaide Crows highlights: AFL live scores, blog
GOAL HAWTHORN
Q4 – 14′
Puopolo with the sweet touch again! He finds Breust 20 metres out, directly in front, who takes the critical contested mark. He nails the goal and we are back to a one-goal game.
HAWTHORN 14.6 90
ADELAIDE 15.6 96
Hawthorn Hawks vs Adelaide Crows highlights: AFL live scores, blog
Q4 – 14′
The intensity has lifted here, with every touch crucial, and (as cliche as it sounds) the next goal so important to both sides.
HAWTHORN 13.6 84
ADELAIDE 15.6 96
Hawthorn Hawks vs Adelaide Crows highlights: AFL live scores, blog
GOAL ADELAIDE
Q4 – 16′
They’ve hit straight back. Lynch was in the right place at the right time after the Walker touch, giving them a big goal in the context of the game.
HAWTHORN 13.6 84
ADELAIDE 15.6 96
Hawthorn Hawks vs Adelaide Crows highlights: AFL live scores, blog
GOAL HAWTHORN
Q4 – 16′
What about the pace from Puopolo. After the clearing possession, he got ahead of his chasers to land the first goal of the quarter.
HAWTHORN 13.6 84
ADELAIDE 14.6 90
Hawthorn Hawks vs Adelaide Crows highlights: AFL live scores, blog
Q4 – 17′
Adelaide get their opportunity to mount pressure with a ball-in near the goal-line.
HAWTHORN 12.6 78
ADELAIDE 14.6 90
Hawthorn Hawks vs Adelaide Crows highlights: AFL live scores, blog
Q4 – 18′
Hawthorn putting the pressure on Adelaide early on with some touches deep in the 50. The Crows survive, and clear down the wing.
HAWTHORN 12.6 78
ADELAIDE 14.6 90
Hawthorn Hawks vs Adelaide Crows highlights: AFL live scores, blog
Here we go! The final quarter is about to get underway, with Adelaide holding a 12-point lead.
Hawthorn Hawks vs Adelaide Crows highlights: AFL live scores, blog
Hawthorn maintain their advantage in the centre clearances, but it is Adelaide that is using the ball much more effectively.
Hawthorn Hawks vs Adelaide Crows highlights: AFL live scores, blog
Sam Mitchell was kept to just four touches in that quarter, whilst Scott Thompson rockets up to a game-high 27 disposals.
Hawthorn Hawks vs Adelaide Crows highlights: AFL live scores, blog
THREE-QUARTER TIME
Just how important will that last goal prove? Hawthorn looked to be getting back into the contest, before Sloane (who is up there for Man of the Match honours) gives Adelaide a handy lead. They lead by 12 with one quarter to play. Can the Hawks get themselves out of jail?
HAWTHORN 12.6 78
ADELAIDE 14.6 90
Hawthorn Hawks vs Adelaide Crows highlights: AFL live scores, blog
GOAL ADELAIDE
Q3 – 0′
Massive goal in the context of this game. Sloane was held back deep inside Hawthorn 50, and converts the opportunity, giving Adelaide a two-goal lead.
HAWTHORN 12.6 78
ADELAIDE 14.6 90
Hawthorn Hawks vs Adelaide Crows highlights: AFL live scores, blog
GOAL HAWTHORN
Q3 – 1′
Hawthorn receive another 50-50 free kick, but they make the most of it. They find open space, with Smith getting a nice roll from beyond 50.
HAWTHORN 12.6 78
ADELAIDE 13.6 84
Hawthorn Hawks vs Adelaide Crows highlights: AFL live scores, blog
Q3 – 3′
Hawthorn receive a soft free kick there after Sloane is deemed to have held his man. Hawthorn desperately need a goal before the end of the term.
HAWTHORN 11.6 72
ADELAIDE 13.6 84
Hawthorn Hawks vs Adelaide Crows highlights: AFL live scores, blog
GOAL ADELAIDE
Q3 – 4′
McGovern found Lynch inside 50 with a quality possession. The 40 metre kick is good from Lynch, and Adelaide have two goals in the space of a minute. It’s a handy buffer in a game like this.
HAWTHORN 11.6 72
ADELAIDE 13.5 83
Hawthorn Hawks vs Adelaide Crows highlights: AFL live scores, blog
GOAL ADELAIDE
Q3 – 5′
Walker had time and space in the forward 50, before finding Lyons metres out from the square. He runs into an open goal and boots Adelaide into the lead.
HAWTHORN 11.6 72
ADELAIDE 12.5 77
Hawthorn Hawks vs Adelaide Crows highlights: AFL live scores, blog
Q3 – 6′
Sicily takes a strong mark in the midfield, giving the Hawks a 9-4 lead in contested marks for the night. The intensity of the first half is starting to show, with a noticable drop in this term.
HAWTHORN 11.6 72
ADELAIDE 11.5 71
Hawthorn Hawks vs Adelaide Crows highlights: AFL live scores, blog
BEHIND ADELAIDE
Q3 – 8′
Stratten got back nicely to spoil the contest just out from the Hawks goal square. The rushed behind brings it back to a one point game, with Adelaide looking more likely at the moment.
HAWTHORN 11.6 72
ADELAIDE 11.5 71
Hawthorn Hawks vs Adelaide Crows highlights: AFL live scores, blog
Q3 – 9′
Hawthorn have had to do a lot of defensive work this quarter, and are now up to 69 tackles for the game.
HAWTHORN 11.5 71
ADELAIDE 11.4 70
Hawthorn Hawks vs Adelaide Crows highlights: AFL live scores, blog
Q3 – 11′
The third term has been played more towards the Hawthorn backline, with Adelaide showing a lot more pressure and asking more questions of the Hawks.
HAWTHORN 11.6 72
ADELAIDE 11.4 70
Hawthorn Hawks vs Adelaide Crows highlights: AFL live scores, blog
Q4 – 9′
Adelaide is in the box seat here. You just get the feeling that Hawthorn are starting to feel the pressure and fatigue.
HAWTHORN 14.9 93
ADELAIDE 16.6 102
Hawthorn Hawks vs Adelaide Crows highlights: AFL live scores, blog