


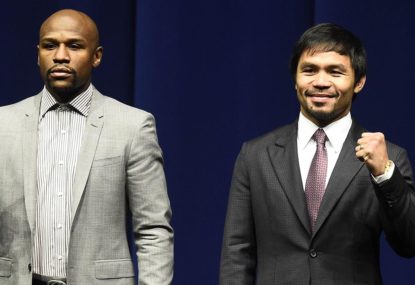
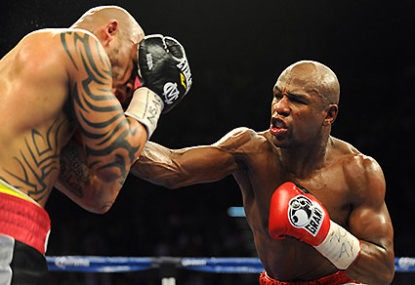
Mayweather vs Pacquiao: One Filipino's perspective
To the world, the upcoming fight between Floyd Mayweather Jr and Manny Pacquiao is the culmination of many years of frustration and false hope.…

Roar Guru
Joined October 2010
129k
Views
117
Published
403
Comments
Published
Comments
To the world, the upcoming fight between Floyd Mayweather Jr and Manny Pacquiao is the culmination of many years of frustration and false hope.…
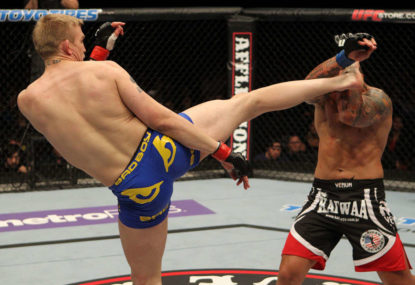
Finally! The legal ban on the use of a cage for mixed martial arts competition in the state of Victoria has at last been…
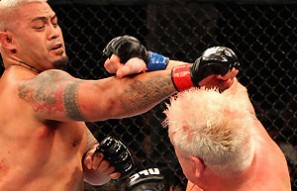
On May 10 the Ultimate Fighting Championship will make its debut in South Australia with UFC Fight Night: Hunt vs Miocic. The event, which…
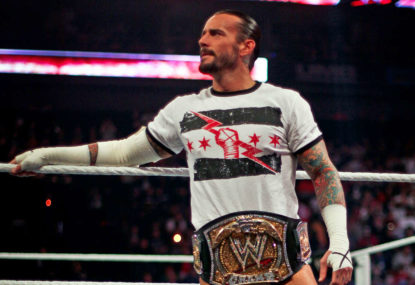
During the UFC 181 pay-per-view broadcast on the weekend, it was announced that former WWE star Phil 'CM Punk' Brooks had signed a multi-fight…
On Sunday in Macau, Manny Pacquiao emerged victorious once again. The 35 year-old Filipino superstar knocked Chris Algieri down six times en route to…
It was an easy day for the judges on Saturday. With 11 fights scheduled on the UFC Fight Night: Rockhold versus Bisping card, all…
FIGHT REPORT: 11 fights, 11 finishes. They sure brought the action today. What a card! Brimage via KO in Round 1 Kelly by submission…
On Saturday November 8, New York-native Al Iaquinta will do battle against Ross Pearson in the co-main event of UFC Fight Night: Rockhold versus…
Constestants of The Ultimate Fighter live a complicated life in the months following their time in the house. They've gone through a life and…

The UFC hosted an open workout for fans and media on Wednesday at the UFC Gym in Sydney. The following are select quotes from…
This Saturday UFC Fight Night: Rockhold versus Bisping takes place at the Allphones Arena. I will be cage-side, delivering live updates as the card…
For most 20-year-olds, a good time usually means a night out on the town, filled with the freedom and care-free behaviour that comes with…
Combat sports are a game of weight classes. They are the real-life interpretation of the 'pick on someone your own size' school of thought.…
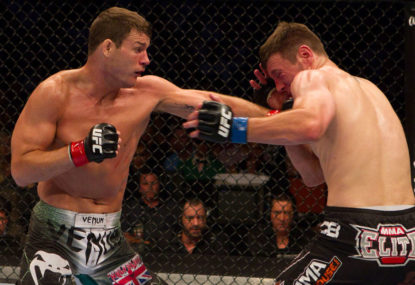
It's become almost a ritual among MMA fighters to call out the candid Brit known as Michael 'The Count' Bisping. "I'm outspoken," Bisping explained…
Rivalries are an intrinsic part of sports. Athletes thrive on the challenge and fans love to pick sides. While a near-equal match-up of skill…
There is no denying that mixed martial arts, like most sports, is a physical endeavour. An arduous one at that. But if you ask…
On November 8, Dan Kelly will be making his UFC debut at UFC Fight Night: Rockhold versus Bisping at the Allphones Arena in Sydney.…
Richie 'Vas' Vaculik might only stand at 168cm and weigh less than 60kg, but you'd be a fool to try him on. The Sydney…
There is no disputing that Wanderlei Silva is a legend of mixed martial arts. As one of Pride's poster boys, the middleweight champion captivated…
For the fourth time, the Ultimate Fighting Championship will return to the harbour city for UFC Fight Night: Rockhold vs. Bipsing. The event marks…
Round 1: Marquardt lands the first hard punch of the fight with a straight right hand. Marquardt looking quick on his feet with successive kicks. A knee drops Te Huna but he recovers, tries a slam but is rolled and ends up on his back. Marquardt working elbows from inside Te Huna’s guard. Marquardt passes into half-guard. Te Huna bleeding crom a cut. Te Huna fires off some shots which has Marquardt on the back foot. Te Huna attempts an ouch-gari trip but fumbles and ends up under Marquardt in mount. Te Huna bridges and rolls but Marquardt stays on his back. MArquardt secures an armbar to finish matters quickly.
UFC: Auckland - weigh-in results and live blog
Main event time! James Te Huna vs. Nate Marquardt.
UFC: Auckland - weigh-in results and live blog
Result: Rosholt by unanimous decision (30-27 all around)
UFC: Auckland - weigh-in results and live blog
Round 3: Both fighters looking visibly tired as the round begins. Rosholt fakes another overhand to shoot in for a takedown. More ground and pound as Soa remains turtled up. Soa rolls to his back but Rosholt gets side control. Rosholt gets the crucifix position but Soa manages to roll to his knees. Rosholt jumps on Soa’s back again with no visible intention of attempting a submission. Soa rolls to his back again with Rosholt in side control. Soa rolls up again but Rosholt adjusts and gets his back. Rosholt manhandles Soa onto his back and sits in side control once again. Rosholt pushes Soa onto his back once again in the final minute. Soa gets to his feet as the round ends, with a massive mouse under his right eye.
UFC: Auckland - weigh-in results and live blog
Round 2: Soa attempting an overhand right but Rosholt counters with a jab. Soa lands a hard left hook but Rosholt answers back. Rosholt fires an overhand as he clinches up. Rosholt fires off uppercuts which drop Soa. Rosholt continues to attack from Soa’s back. Soa gets back to his feet with three and a half minutes left. Rosholt working knees to the thigh, playing it safe. Soa evades a big overhand right. Rosholt lands a hard knee as Soa’s nose is showing the effects of the fight. A hard right and right knee drops Soa again but he hangs on. Rosholt stands to his feet, Soa attempts to punch but stumbles. The two clinch up again, with Rosholt remaining the busier of the two.
UFC: Auckland - weigh-in results and live blog
Round 1: Soa light on his feet early, both feeling each other out. Soa the first to shoot in for a takedown and gets it – thrice. Rosholt back on his feet against the cage. Rosholt using his knee to block a takedown while attempting a single-leg of his own. Both remained clinhed up against the cage. Rosholt lands a hard elbow that forces Soa to drop down for a takedown. Rosholt trying to secure a head and arm choke but lets go. Rosholt now on top landing hard shots with Soa turtled up. Rosholt now comfortable throwing punches from Soa’s back. Rosholt lands on his back and Soa jumps on mount rattling off punches when the bell sounds off.
UFC: Auckland - weigh-in results and live blog
Heavyweight hard hitters up next with Soa “The Hulk” Palelei vs. Jared Rosholt.
UFC: Auckland - weigh-in results and live blog
Result: Oliveira by submission in Round 2
UFC: Auckland - weigh-in results and live blog
Round 2: The two trade wildly but Oliveira gets a takedown quickly. Hioki in top position now and sits back for a leg lock but Oliveira beats him to it. The action halts as both fighters get up as the result of an accidental eye poke. Oliveira has been down for a considerable amount of time. But the action continues! Oliveira aggressive on his attack now with sharp elbows, knees and uppercuts. Oliveira gets double underhooks but Hioki walks over him to get him on his back. Oliveira is still visibly bothered by his eye. Oliveira attempts another triangle but Hioki escapes. Oliveira pushes back with his feet and locks in a guillotine from half-guard but Hioki passes easily. Hioki frees his head and continues to work from side control, eventually securing mount and back control. Hioki is cut over his left eye. Oliveira locks in an arm-in guillotine choke and gets the submission win.
UFC: Auckland - weigh-in results and live blog
Round 1: Oliveira shoots in for a takedown against the cage. Hioki attempts a crazy jumping triangle but gives it up. Oliveira attempts a jumping submission of his own but loses the guillotine. The fighters roll with Oliveira on top but scramble to reverse the positions. Hioki sinks the hooks in on Oliveira’s back but the latter gets back to his feet. Hard shots from the clinch as Hioki spins into a trip to get Oliveira on his back. Hioki moves into half-guard but Oliveira is quick to regain full guard. Oliveira attempts to hook up a triangle but lets it go. Both fighters get back to their fight heading into the final minute. Oliveira attempts a guillotine again but loses it. Oliveira scores with a single-leg takedown. Oliveira locks up an anaconda choke but Hioki escapes. Both return to the clinch as the round ends.
UFC: Auckland - weigh-in results and live blog
Up next are featherweights with Hatsu Hioki taking on Charles Oliveira.
UFC: Auckland - weigh-in results and live blog
Result: Whittaker by Unanimous Decision (30-27 all around)
UFC: Auckland - weigh-in results and live blog
Round 3: The crowd solidly behind Whittaker at the Vector Arena. Whittaker circles as the left side of his face is visibly red. Whittaker lands three solid jabs but Rhodes answers with a right hand. Another right from Rhodes lands at the 3min mark. Rhodes’ mouth is now bleeding quite visibly. Whittaker shoots in for a double-leg and lands it, ending up in half-guard. Whittaker creates space for elbows entering the final minute. Rhodes attempting to roll over but Whittaker keeps composed as the referee stands them up with 10 seconds left. Rhodes unleashes a spinning kick as the fight ends but it’s blocked.
UFC: Auckland - weigh-in results and live blog
Round 2: Whittaker landing more kicks now to begin the round. Rhodes misses with a big head kick. Whittaker returns fire with a head kick that lands, followed by a solid left hook. Rhodes gets a quick takedown but Whittaker shoots back to his feet quickly. Whittaker misses with wild shots and Rhodes counters. Near the midway mark and the stalemate on the feet continues – strike, counter and repeat. Whittaker attempts a superman punch but a leg kick halts his efforts. A switch kick from Whittaker is nearly caught. Whittaker lands a quick uppercut as the round draws into the final minute. A counter-uppercut from whittaker stops Rhodes’ superman punch. Rhodes attempts a Capoeira wheel kick to close out the round.
UFC: Auckland - weigh-in results and live blog
Round 1: Whittaker launching a left body kick early but Rhodes catches it. The two exchange leg kicks in the center of the Octagon. Whittaker working off a spearing jab, Rhodes answers with an overhand right. Whittaker lands a left hook that gets Rhodes’ attention. The two continue to go back and forth at the midway mark, very evenly matched. Rhodes slips momentarily but recovers. Whittaker dodges a right hand well. Whittaker lands a hard right hand-left hook combo followed by a body kick. Rhodes pushes up against the cage. Whittaker attempts a front kick to the fac but misses. Rhodes returns fire with a head kick but it’s blocked.
UFC: Auckland - weigh-in results and live blog
Main card about to get underway! Robert Whittaker from TUF: Smashes vs. Mike Rhodes.
UFC: Auckland - weigh-in results and live blog
Result: Matthews by submission in Round 3 (triangle choke)
UFC: Auckland - weigh-in results and live blog
Round 3: Matthews stalking Johnson as the latter waits for an opportunity. A hard right lands for Matthews, followed by a hard knee in the clinch. Matthews gets an arm-in guilltone, rolls, switches to a guillotine but lets go in favour of ground and pound. Elbows with maximum leverage on mount land before Johnson rolls over. Matthews secures his back and continues to rain down blows. Matthews works for the choke but Johnson defends. Johnson rolls out but Matthews secures a triangle choke for the submission.
UFC: Auckland - weigh-in results and live blog
Round 2: Johnson attempts a swinging left uppercut but misses. The referee deducts a point from johnson for 12-6 elbows to the back of Matthews’ head. Matthews lands a hard left head kick but Johnson stays on his feet to move away. Matthews attempts a double-leg but Johnson managing to stay upright. Johnson holding the fence but the referee picks up on it. Matthews attempting a single but Johnson nearly reverses. Uneventful heading into the final minute. Matthews attempts a trip but doesn’t land it. Matthews gets Johnson down and lands in side control as the round ends.
UFC: Auckland - weigh-in results and live blog
Round 1: Matthews pressing the action up quickly against the cage and using shoulder strikes. Matthews working for the single but Johnson defends. Johnson secures a guillotine choke and jumps into guard but Matthews escapes. Matthews rains down some ground and pound from the top. Matthews landing some elbows with authority past the halfway mark. A cut opens up on Johnson’s head. Matthews moves into the north-south position before landing in side control. Johnson rolls over and Matthews now working on top in the final 30 secs. Matthews lands some hard but blocked shots as the round ends.
UFC: Auckland - weigh-in results and live blog
Final prelim fight up next with Jake Matthews vs. Dashon Johnson.
UFC: Auckland - weigh-in results and live blog
Result: Vaculik by unanimous decision (30-27, 29-28 and 29-28)
UFC: Auckland - weigh-in results and live blog
Round 3: Roldan continues the attack on the feet with a right body kick. An overhand right gets Vaculik’s attention. Roldan switching up the kicks and punches which is leaving Vaculik a bit bewildered. Roldan fakes the right hand to land left kicks repeatedly. Leg kicks continue to keep Vaculik at a distance, followed by a quick left hook. A hard knee in the clinch stuns Roldan as Vaculik continues to try for takedowns. Vaculik beginning to find a home with his right hand in the last 2 minutes. Vaculik shoots in for a single but Roldan defends once again .Roldan continues with the leg kicks in the final minute of the fight.
UFC: Auckland - weigh-in results and live blog
Round 2: Roldan lands a big head kick before Vaculik shoots in and gets the takedown. Vaculik works over into half-guardm landing elbows and punches. Roldan recovers full guard as the pressure mounts from the crowd to stand up the action. At near the 2min mark the referee stands them up. A side kick to the head lands for Roldan. Vaculik shoots in again but Roldan defends. Roldan now shrugging off Vaculik’s takedown attempts and is thinking head kick. Hard leg kicks gets Vaculik’s attention as Rolden continues to shrug off the takedowns. Roldan shrugs off another takedown and lands more leg kicks. Vaculik gets a last-second takedown at the bell.
UFC: Auckland - weigh-in results and live blog
Result: Marqyardt by submission in Round 1 (Armbar)
UFC: Auckland - weigh-in results and live blog